


Crowd crush, which happens when the density of a crowd gets abnormally high, can usually lead to irrevocable deadly results. When a crowd crush happens, it is very hard to extract oneself from the crowd and people will get really panic. Therefore, even if there is professional staff present, it is still hard to get things under control. In this case, it might be too late when we want to address this issue after the crowd already gets dense. So I ask myself:
What Can I Do to Prevent Crowd Crush?
Opportunities
-
Detect the signals of potentially dangerous situations
-
Monitor live crowd flow
-
Send alarms to visitors
-
Provide instructions for the crowd to get away safely
-
Inform professional management teams beforehand to get prepared
Based on the initial exploration of the opportunities, I realized two main user groups: individual visitors and the environment where visitors gather.
User Groups

As an individual in the crowd, I don't know the signals of danger. I want to be alarmed before things get too late. I'm also worried about the situation when I feel uncomfortable and need help.

The environment side needs to know and monitor the data of the crowd. It has to be proactive to inform people in the environment about the detected potential danger while keeping them calm.
I was trying to reach a single solution that builds an interactive system that involves both individuals and the environment. It would allow them to communicate the data and information about the current situation with each other for better monitoring and informing.
A (sad) Design Decision
However, I didn't expect the technological limitation. I failed to connect the hardware I used for both groups for communication. (Jump to details about this challenge)
Therefore, instead of making the two groups join a common communication space, I decided to approach the problem with two different ideas based on the "direction" of communication: the individual sending messages to the environment, and the environment sending messages to individuals.

Smart Badge
A wearable that sends alarm and helps seek help pre-crowd crush
How It Works
Feature 1: It can detect signals that may indicate potential crowd crush and send alarms.

Light sensor monitors the input

Input controls the light and audio

Orange light and audio on
Feature 2: It helps users seek help and attention when they need but are not able to.

Pressing the button as the input

Input controls the light and audio

Red light and audio on
Feature 3: It helps users locate them when lost.


Motion sensor detects falling
Abnormal movement triggers light and audio
Blue light and audio on
How I Get to the Final Design
I started with quick sketches to get initial ideas of how I wanted this product to look. Then I moved to build a sketch model using foamcore to test the usability and feasibility of my idea. After making sure it works, I used solidworks to design and build the 3d model. I went through several rounds of iteration to improve the model's appearance and usability to reach the final product.

Sketches

Foamcore Model

3D Model Iteration

Final 3D Model

Solidworks Drawing

Final 3D Solidworks Product
Click to see a more detailed description :)
Problems and Decision Making During Iteration
After the first version of model being built in Solidworks, I 3D printed it and found several problems.

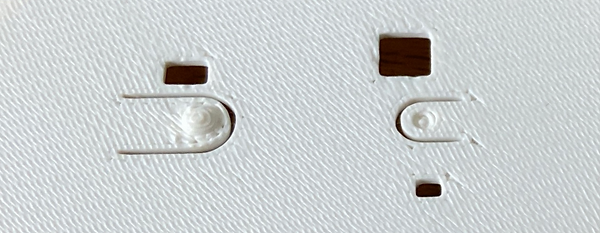
1
2
The first problem came with the press button design (1). Since the buttons are too small, assembling the product is not so easy because the buttons would always fall off if not correctly operated, leading to potential frustration in users.
The more problematic part is the space I left for the USB cable (2). Though I modeled it beforehand in Solidworks, it is still too small for the cable to get in. This allows me to be aware of the possibility that a real 3D model could still be failing despite the previous modeling in 3D tools.

In the following rounds of iteration, I mainly worked on improving the most urgent problems: the USB cable space and the surface design that reflects the input and output.
For further improvement, I started with addressing the button issue. Considering the ability to provide a better assembly experience and fewer losses of the parts, I replaced the pressed button design with the flex button design, which means that the two buttons are not completely cut off from the surface. In this way, the buttons are flexible enough to be pressed down and at the same time tightly stick with the surface so the whole number of parts is cut down from 4 to 2, greatly increasing the easiness of assembling and carrying.

I also realized that the friction fit of the caps is slightly loose and may also lead to easily falling apart. Therefore, I added some little bumps to the surfaces which give more friction that allows the caps to click together more tightly.
Final Design and Demo


Limitations

-
Model is still too thick.
-
The volume of the speaker is not loud enough.
-
Motion sensor is not working well enough.
Takeaways

-
Libraries may conflict.
-
A small flexing button is easy to break.
-
Adding bumps can make friction fit much tighter.
The badge allows individuals to be aware of potential dangers, but the scope of its functions is still limited. It could only sense the environment near the individuals but is not capable of telling the users how the larger area looks, for example, whether there are people gathering around 100 m away where the users are heading to. Therefore, to enable this communication that the environment could initiate to tell users the larger-scale data it monitors, I continued to built an interactive system.

Interactive Crowd Crush Alarm System
An interactive system that monitors the crowd density and sends group alarms
How It Works

1.
The photoresistors installed under the ground will sense the change in the crowd density by monitoring the time length of the holes above them being covered.
2.
The distance sensor is installed at the end of the narrow area and detects visitors once they enter this area.


3.
Visitors will each wear a band that has an RGB LED light and a buzzer.
4.
The system will also use the LED billboard nearby to send out information to broader audiences. Everything will stay normal when the crowd density is at the normal level.


5.
Once the crowd gets abnormally dense, alarms will be sent to the bands on visitors entering this area and the billboard will also show warning information.
How I Get to the Final Design
We first narrowed down our use case during the initial sketches. Then we built our model and planned our circuits' installation. We wrote Arduino codes based on the features we would like to implement. We also designed a digital interface that displays the warning message.

Sketches

Street Model

Installation

Board Connection

Arduino Codes

Digital Interface
Click to see a more detailed description :)
Challenges and Decision Making
Challenge 1: How Might We Determine the Crowd Density
During our sketches, we only decided on measuring the time length of the light being under the threshold (i.e. the hole being covered). We thought when the crowd gets denser, there will be more people walking around or people will be moving more slowly, both leading to a longer time of the hole being stepped on.
However, as we thought through the process, we realized that there is a chance that somebody would accidentally stand there and not move for a while, which may cause a false alarm. Therefore, we added two extra measurements - first, we used two photoresistors installed at different points on the road. In this case, we counted the time at both photoresistors which could add more accuracy to the monitoring system.
Besides, we also measured the frequency of these two photoresistors being covered by adding a time delay in the code between two measurement points and then compared the value to determine how frequently the holes are covered. By doing so, we ruled out more false positive cases.
Challenge 2: Should Everyone Receive the Alarming Messages
As we all know, there will be a lot of people in a busy area. Therefore, we spent some time determining whether we want everyone in the busy area to receive the band messages or we would like to narrow down our user group.
After revisiting our user goal, we reached an agreement that all visitors should at least be aware of the changes in the crowd dynamics but not all of them need to receive the alarming messages on their band because it may interrupt their visiting experiences in this area if they are not close to places with restricted space.
We also added two more features to solve this problem. First, we added the distance sensor to only loop in the visitors who enter this small area to receive the most urgent and direct alarm as our primary users.
Then, we designed an interface to show general live data monitoring of the crowd and immediate alarms to the broader audience, i.e. our second users, people in the larger busy area but not in the small area with limited space. I used processing code to connect the screen to the system as well. The screen will then be the advertisement LED billboard in real life. It will display normal business advertisements and then change to alarm messages when the system is triggered.


Video Demo
Limitations
-
Crowd State Measurements Could Be More Accurate
Due to the limited access to Arduino components, we only used two photoresistors to sense the crowd. Our crowd-sensing accuracy could be improved by placing more sensors and undertaking more complicated algorithms to determine if there is a potential for crowd-stepping.
-
Measurements Could Be More Diverse.
Our current prototype only senses light to determine if there is a crowd. Taking more inputs into consideration, such as sound, may help to further improve our crowd-sensing accuracy.
-
Wearables Are Not Wireless
Currently, our wristband is tied to wires, which made it inconvenient to wear and use. In an ideal scenario, the wristband should be wireless so that users can easy wear it around. As I mentioned in the beginning, due to technical limitations, I failed to get the circuit playground express connected to the Arduino board. If the wearable could wirelessly communicate with the system, usability will be greatly improved.
Learnings
-
For physical prototyping, quick and early usability testing using sketch models will greatly improve the design and avoid the waste of materials and time.
-
Real-life problem-solving always comes with technical constraints and narrowing down the scope and looking for alternative representations can be helpful for overcoming or bypassing the constraints.
-
Identifying clear user goals is very helpful for informing future design directions and decisions.